QuickBooks, of course, can’t do your taxes for you. But it helps you lay some of the groundwork. We’ll look at the program’s tax-related reports and its powerful report-filtering options.
But first, you’ll need to make sure that this output will be accurate.
Describe your company accurately
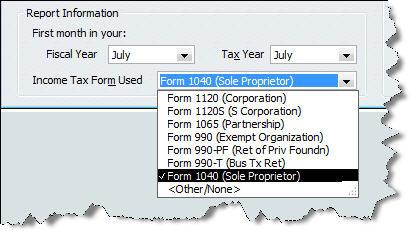
Your tax entity setting should have been established when you first set up QuickBooks, but verify that you’ve specified the correct one. Go to Company | Company Information. Your Report Information is in the lower left corner. Click the arrow next to Income Tax Form Used to see what’s active.
Figure 1: Make sure that QuickBooks is set up for the correct tax entity.
QuickBooks automatically assigns some of your accounts to their matching lines on the 1040 and assorted forms and schedules; this is called tax line mapping. So when you create tax reports, related transactions will be grouped by these designations.
This can be a real time-saver – as long as you’ve specified the correct entity. If:
- <Other/None> was selected
- This setting is incorrect
- You’re starting a business and don’t know which to choose…
… please contact us. If you switch entities, your existing tax line mapping will disappear and will have to be reassigned.
Dedicated tax reports
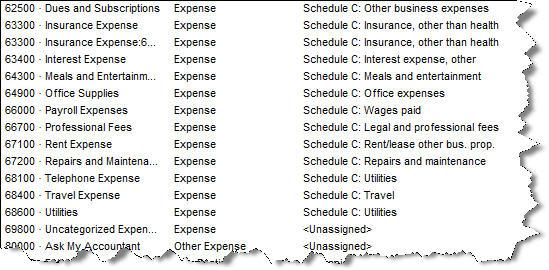
Many of QuickBooks’ general financial reports provide tax-related information. But there are some that specifically relate to the numbers that will go on your return. Go to Reports | Accounting & Taxes | Income Tax Preparation. Here’s an excerpt of what you’ll see:
Figure 2: QuickBooks automatically assigns many accounts to the appropriate tax form lines, based on your specified tax entity.
Here, QuickBooks shows you which tax lines have been pre-assigned to your accounts. You can specify a tax form line for unassigned accounts, but this is something you should not attempt on your own. This report, though, will give you an idea of how useful your report output will be and where you’ll need our assistance.
Other reports provide tax-related data. You can access them by going again to Reports | Accountant & Taxes and clicking:
Income Tax Summary. This displays totals for each tax line that’s relevant to your particular tax entity. Double-click on any number, and the Tax Line By Account report appears, detailing every transaction related to every tax-related account (you could add a column for Tax Line in Display options and make this quite a useful report).
- Income Tax Detail. This lists all individual transactions by tax form/schedule line assignment.
Paring it down
Some tax reports can be very lengthy; you may want to filter them to look at various “slices.”
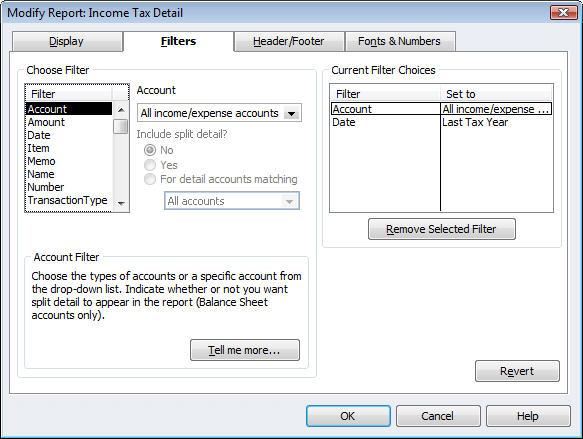
Click Customize Report | Filters:
Figure 3: This window displays a powerful set of filtering options.
The options listed under Choose Filter are available on other reports; they help you set up incredibly complex searches using multiple filters.
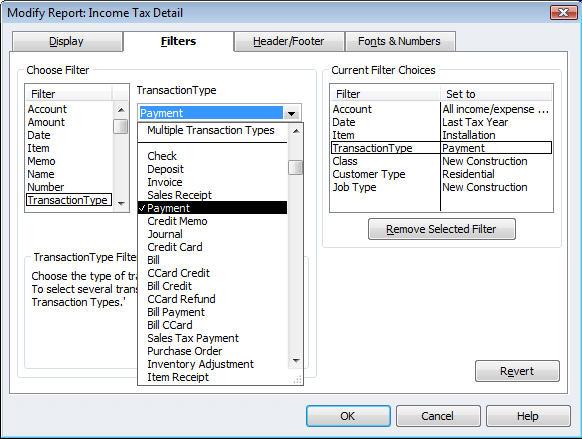
Let’s say you want a report that displays your installation labor costs on new residential construction from the last year (you could also throw other variables in). You’d simply choose the filters from the left pane and then select related options in the next pane (usually a list). You’d want to also click on the Display tab to make sure that the appropriate columns appear.
Figure 4: You can apply multiple filters to your reports.
QuickBooks reports can shave time off of tax preparation, and filtered views help you scrutinize your data in quite creative – and very useful – ways. The program’s boilerplate reports have their place in simple examinations of your financial status, but filters are potent tools. They can facilitate the kind of deep analysis that helps you make critical business decisions.
If you have questions on this or any other QuickBooks feature, call or email us. We’re your partner and we’re here to make your business better.


